
How a Piercing Heals
When you heal a piercing your body grows a tunnel of skin, called a fistula, around the jewelry in the piercing. This process happens slowly over a number of months. Everyone heals differently as your overall health, grooming habits, and lifestyle can affect the healing process. Paying attention to & caring for your piercing during the healing process is critical to successfully healing your piercing. This includes shortening your jewelry after your initial swelling goes down. (aka downsizing)
Below are listed general rules and tips to help you let your body heal your new piercing!
Remember to get your piercing checked up &
downsized after 5-6 week.
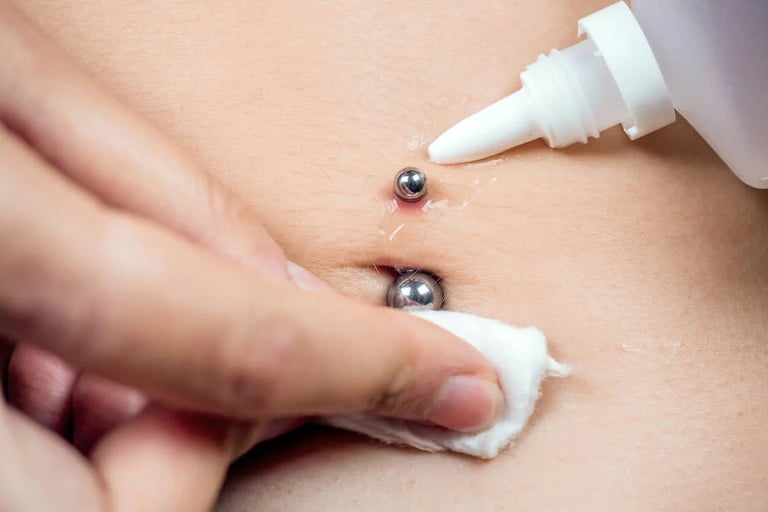
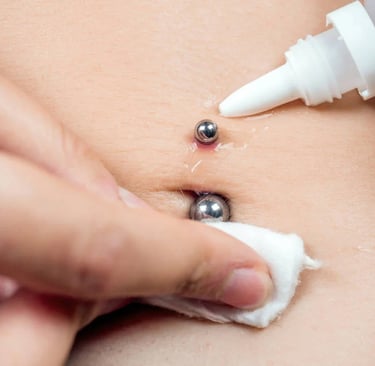
How to Clean
Step One: Thoroughly wash your hands
Step Two: Spray your piercing’s entrance and exit with saline solution.
Step Three: Allow saline to soak into any crust or build up for one full minute.
Step Four: Spray piercing with saline again, using the pressure from the can to remove all crust or build-up.
Once daily: Rinse your piercing with fresh water in the shower. This should loosen any very hard crusty matter that forms on the jewelry. After your shower do a saline cleaning.
Optional* if you cannot remove all of the crust or
buildup-off from your piercing, saturate a Q-tip with
saline and gently remove remaining crust or build-up.
Oral Piercings
Drink lots of water!!
Rinse your mouth with sterile saline or bottled water for 30 seconds after eating, smoking or drinking. Swish like mouthwash.
Do not use Listerine or any other mouthwash that contains alcohol.
You should cut back, or stop, smoking while your piercing heals. Smoking can be very irritating to a healing piercing.
It is best to use a mild, non-whitening toothpaste during healing. Whitening toothpastes can cause damage and irritation to a healing piercing.
Remember to get your oral piercing checked up &
downsized after 3-4 week.
DO THIS
Drink plenty of water.
Clean piercing in the shower daily.
Have your piercing checked on & downsized after 5-6 weeks. (3-4 weeks for oral)
Avoid sleeping on piercing and change pillowcases often. **
Call if you have any problems questions or concerns.
Remember to downsize your piercing. (Generally, 5-6 weeks)
Tell your pets you love them.
**PRO-TIP's: If you find yourself rolling onto your ear often put a
large hairclip on that side of your head. Sleeping with you ear in a
neck pillow can take pressure off the piercing by raising your head.
DO NOT DO THIS:
Touch your piercing.
Swim for 8-10 weeks.
Use alcohol, peroxide, Tea Tree oil, anti-bacterial soap, ointments, BZK products (eg. Ear care solution, Bactine or Epsom salt) on your piercing
Rotate, move, or play with jewelry.
Use cotton products to clean your piercing.
Apply makeup, perfumes, hair products, or lotions to piercing site.
Take advice from friends.
Forget to downsize your piercing
Aftercare for Tattoos and Piercing
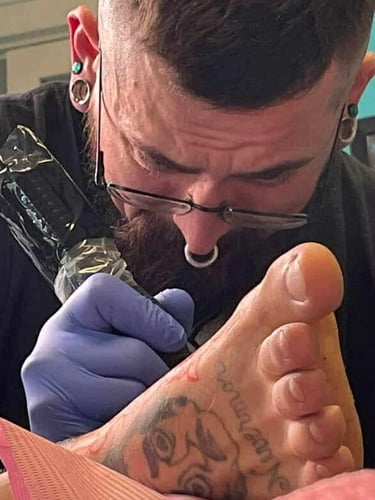
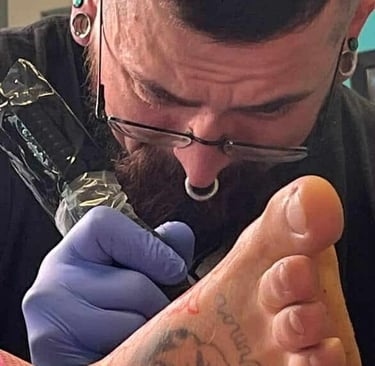
How a Tattoo Heals
A tattoo’s healing journey starts right after you finish in the chair. In the first few days you may see redness, slight swelling, and a thin leak or oozing as your body works to form a protective layer over the ink. Gently wash with lukewarm water and a mild, fragrance-free soap, pat dry, and apply a thin layer of the ointment or moisturizer your artist recommended. As the days go by, the surface may scab and peel; resist picking or peeling it, which can affect color and cause scarring. Avoid soaking in baths, pools, or hot tubs, and shield the tattoo from direct sun; once healed, use sunscreen to protect the colors. Healing times vary, but most of the outer layer dries and flattens in about 2–4 weeks, while deeper healing can take several months; if you notice increasing redness, warmth, pus, or fever, contact your tattooist or a clinician promptly.
Ah, a fresh tattoo! Here’s a clear, step-by-step aftercare guide to help it heal cleanly and keep the colors vibrant. Remember to follow your artist’s specific instructions first.
Step One: Right after the tattoo - Leave the initial bandage or cling film on as advised by your artist. - Wash your hands before touching the tattoo.
Step Two: First cleansing (0–24 hours after removing the bandage) - Gently remove the bandage as directed. - Wash with lukewarm water and a mild, fragrance-free soap. Use clean hands—no scrubbing. - Pat dry with a clean paper towel or allow to air-dry. Do not rub.
Step Three: Moisturize lightly (first 2–3 days) - Apply a very thin layer of a fragrance-free ointment or a tattoo aftercare product recommended by your shop (e.g., a thin film, not a thick layer). - Reapply as needed to prevent cracking, but don’t overdo it.
Step Four: Transition to lotion and ongoing care (days 3–14) - After a couple of days, switch from ointment to a fragrance-free, non-irritating moisturizer. - Cleanse once or twice daily and reapply a light coat of moisturizer each time. - Avoid harsh exfoliants or heavy creams that can clog pores.
Step Five: What to avoid during healing - Do not soak the tattoo in water: avoid baths, swimming pools, hot tubs, and oceans. - Avoid direct sun exposure; after initial healing, use a broad-spectrum sunscreen on the tattoo. - Wear loose, breathable clothing to prevent rubbing and irritation. - Do not pick, scratch, or peel flaky skin; allow it to heal naturally.
Step Six: Itching and minor irritation - Itching is normal. Gently pat or tap the area if it itches; apply a clean layer of moisturizer if needed. - If you notice persistent redness, excessive swelling, warmth, pus, or fever, contact your tattoo artist or a healthcare professional—these could indicate infection or an allergic reaction.
Step Seven: After full healing (color and longevity) - Continue protecting with sunscreen whenever the tattoo is exposed to the sun. - Keep the skin moisturized to maintain softness and brightness. - If you notice fading or unusual texture after healing, consult your artist for guidance.
Contact
Get in touch
Follow US
LURE Tattoo&PiercingLLC© 2025. All rights reserved.